Active Directory (AD) is crucial for businesses and IT professionals. It offers a robust platform for directory-based identity-related services. AD is integrated into the Windows Server infrastructure and helps organize, manage, and secure network resources. If you're interested in implementing this tool, our detailed guide provides a step-by-step walkthrough on installing and configuring Active Directory on a Windows Server virtual machine (VM).
Table of Contents
Terminology
Active Directory (AD): A directory service developed by Microsoft for Windows domain networks. AD stores information about objects on the network and makes this information easy for administrators and users to find and use.
Windows Server: A group of server operating systems released by Microsoft. It is designed to handle corporate networking, database storage, and application hosting, among other functions.
Virtual Machine (VM): A software-based emulation of a computer. VMs run like physical machines, based on a computer architecture, and provide the functionality of a physical computer.
Server Manager: A Windows Server utility that allows administrators to manage local and remote servers.
Active Directory Domain Services (AD DS): A core function of Active Directory, AD DS provides the methods and tools to organize and manage users, computers, and other directory-based entities within a network.
Domain Controller: A server that handles security authentication requests within a computer network domain.
Step-by-Step Guide to Installing Active Directory
For this guide, we'll assume that you're using Windows Server 2019, although the process will also be similar for other versions. If you haven't set up your Windows server yet, check out my detailed step-by-step guide: Setup Windows Server VM for Active Directory, and get your server and network up and running.
Step 1: Launching Server Manager
On booting up your Windows server VM, the Server Manager dashboard typically auto-launches if it does not, simply type "server manager" in the search bar and initiate the application manually.

Step 2: Initiating Active Directory Installation
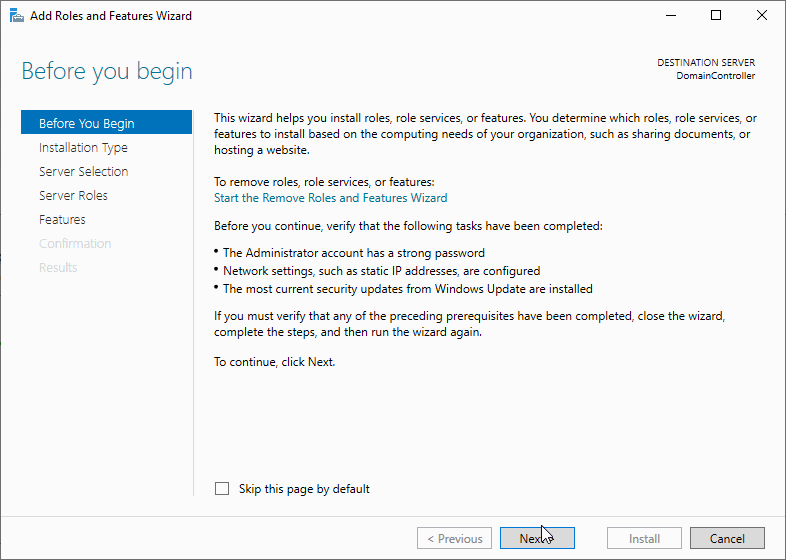
With the Server Manager dashboard open, navigate to the quick start window and select the "Add roles and features" option. This will lead you to the "Add Roles and Features Wizard," which is used to install Active Directory.
To navigate the wizard:
1. Click "Next" twice to reach the "Server Selection" page.
2. On the "Server Selection" page, choose your Windows server for the installation, and select "Next".

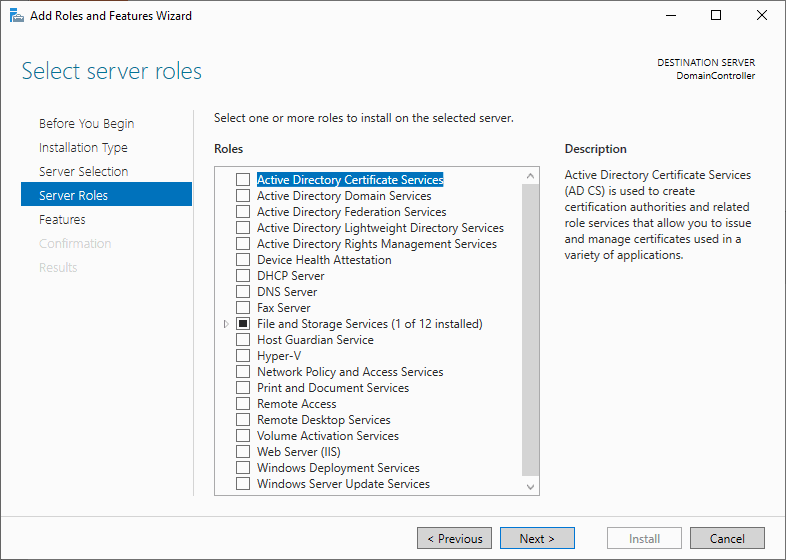
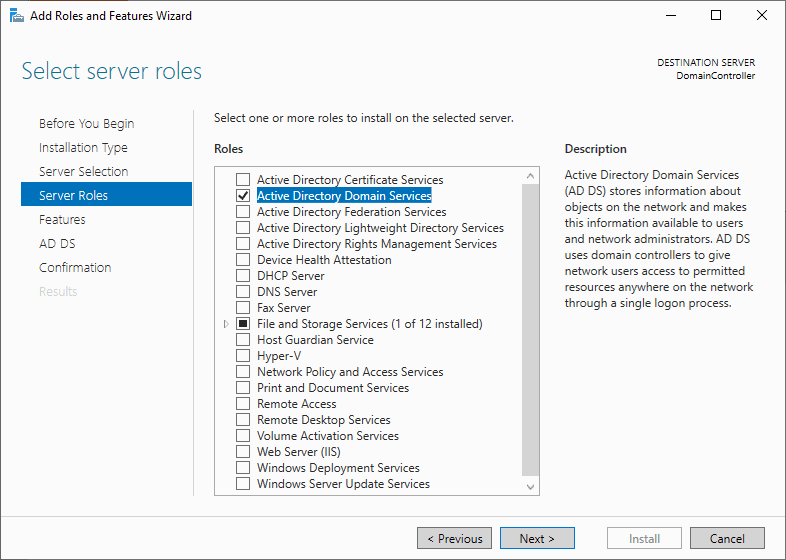
3. Navigate to the "Server Roles" page, opt for "Active Directory Domain Services," and click on "Add Features" for confirmation. Then click "Next".
4. Continue selecting "Next" until you land on the "Confirmation" page. Now, click on "Install".
Once the installation concludes successfully, a confirmation message will appear. To exit the wizard, simply select "Close".

After these steps, Active Directory will be installed on your Windows Server.
Post-Installation Configuration
With Active Directory installed, we can finalize its configuration on our Windows server.
Step 1: Initiating Post-Installation Configuration
Post-installation, you should notice a notification in the upper right corner of the Server Manager dashboard. Click on the notification icon to view details and select "Promote this server to a domain controller." This action will trigger the "Active Directory Domain Services Configuration Wizard" to transform our Windows server into a domain controller.
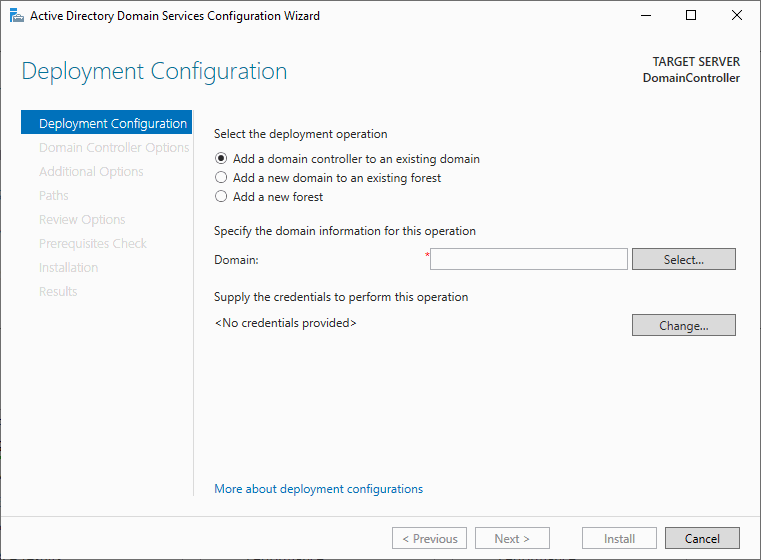
Step 2: Deployment Configuration
In the initial "Deployment Configuration" tab, under "Select the deployment operation," choose "Add a new forest." Under "Specify the domain information for this operation," input the name of your domain. For this guide, I've chosen "mydomain.com." Click "Next" to proceed.
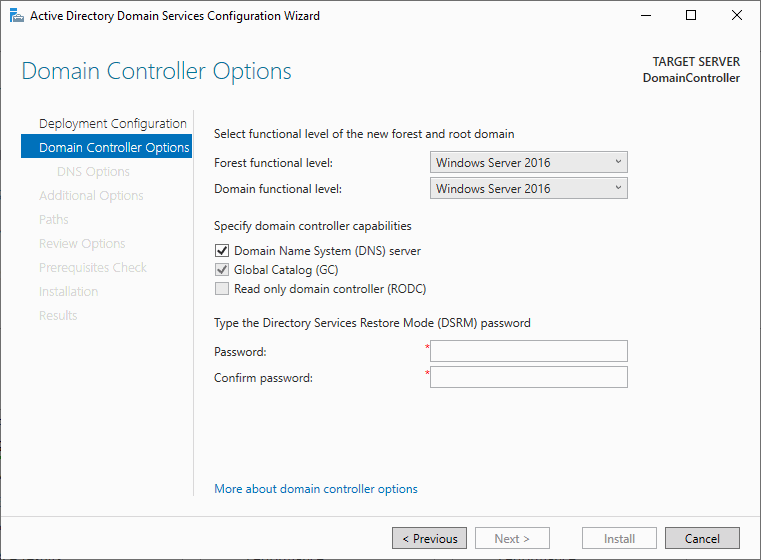
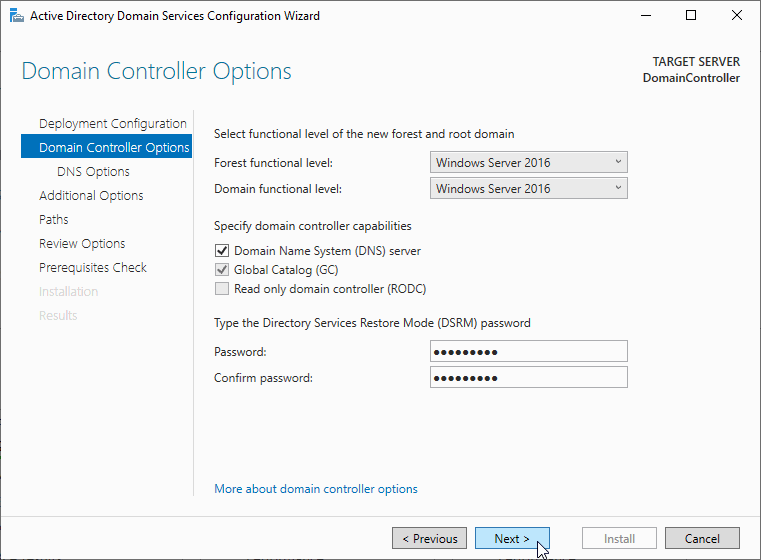
Step 3: Domain Controller Options
In the subsequent "Domain Controller Options" tab, designate a password for your domain and click "Next."
Step 4: Completing the Configuration
Keep selecting "Next" until you reach the "Installation" tab. Here, choose "Install".
Post-installation, a prompt will appear to restart your VM.

Congratulations! You have successfully installed and configured Active Directory on your Windows Server. Now, you can access "Active Directory Users and Computers" on your VM, an application we will use to create organization units, user accounts, security groups, and so much more!