Active Directory (AD) is the backbone of many enterprise IT environments, offering centralized management for user accounts, devices, and security policies. In previous articles, we’ve touched on setting up your AD environment and organizing it using Organizational Units (OUs). Today, we delve deeper into user account management - standard and privileged - and the crucial difference between the two. We’ll also explain why the default Administrator account isn’t the best choice for routine AD management and guide you on transitioning to a custom System Administrator account.
Table of Contents
Terminology
Active Directory (AD): A directory service developed by Microsoft for Windows domain networks.
Organizational Unit (OU): A subdivision within an Active Directory to place users, groups, computers, and other OUs.
Standard User Account: A regular account with limited permissions, used primarily for day-to-day operations.
Privileged User Account: An account with elevated permissions granting more extensive access to resources and operations within the network.
SamAccountName: The logon name used to support clients and servers from previous versions of Windows. It's unique in the domain, ensuring all users have a distinct logon name.
Principle of Least Privilege (PoLP): A computer security concept wherein a user is given the minimum access necessary to perform their job functions.
Pre-requisites: What You Need to Start
Building off our previous posts, this guide will assume that you're using Windows Server 2019 and have created the top-level OU and departments (sub-OUs) for our coffee company. Links are provided below for easy access to these guides:
Creating A Standard User Account in AD
Managing user accounts in Active Directory is crucial for IT administrators. This guide will walk you through creating a standard user account securely and efficiently.

Step 1: Open Active Directory Users and Computers
You can find this by clicking the Start button and typing 'Active Directory.'
Step 2: Creating a new user
Navigate to the desired OU where you want to create the new user.
Right-click on it and select "New" > "User".
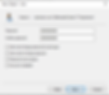
Step 3: Fill in the user's details
Input the First name, Last name, and User logon name. Click "Next."
First name
Last name
User logon name (SAMAccountName): It is crucial to have a proper logon name as it is used for accessing domain-joined resources. In larger organizations, it is essential to maintain a consistent and practical naming convention for these login names. Our organization will utilize the user's email addresses as their login name (SAMAccountName). This approach offers two significant benefits. Firstly, users must only remember their email addresses to log in. Secondly, the login name will always be unique since email addresses are unique identifiers.

Step 4: Set up the user's password
Set a password for the first login and enable "User must change password at next logon." Click "Next."
Password: As the sysAdmin, we must set the initial password for a new user to log into their account. Avoid default passwords; don't use a generic default password for all new accounts.
User must change password at next logon: Ensure this box is not checked. In a real corporate environment, they usually have this option enabled to ensure everyone creates their own secure password the first time they log in. But for our purposes, we're going to skip that step to keep things simple as we set up everything else.
Step 5: Review and finish
Check your entered details and click "Finish" to create the user.

Excellent work! You have acquired the knowledge to create a regular user account in Active Directory. By implementing secure measures such as generating unique passwords and requiring initial login changes, you can enhance your organization's IT security and effectiveness.
Introduction to Privileged Accounts
In managing a networked environment, certain tasks go beyond the capabilities of a standard user account. Privileged accounts grant elevated access and permissions, enabling administrators to read, write, and execute commands that regular users can't. These accounts are crucial for carrying out vital operations, and given their extensive access, it's essential to create and manage them separately from standard accounts.
Examples of Privileged Accounts
Administrator Accounts: These are the most common types of privileged accounts, allowing high access to systems or networks.
System Accounts: Often used by software and applications to access resources, humans do not typically access these but can have high levels of privileges.
Service Accounts: These are accounts services or applications use to interact with the operating system and other services.
Why are Privileged Accounts Important?
System and Network Maintenance: Privileged accounts allow IT personnel to install software, update system configurations, and perform routine maintenance.
Quick Troubleshooting: When problems arise, privileged accounts enable swift identification and resolution without being hampered by access restrictions.
User and Resource Management: Only privileged accounts should create or modify user accounts, adjust user privileges, or allocate resources.
Data Protection and Backup: These accounts can access all data, making them essential for system backups or migration.
Reasons to Separate Standard and Privileged Accounts
Principle of Least Privilege (PoLP): Limits user access to what they need for their job to avoid unnecessary system risks.
Mitigating Risks: Limiting administrative access to a select few individuals minimizes the potential damage or data theft from a compromised account.
Audit and Accountability: Using separate accounts allows improved auditing and tracking. Monitoring and detecting unusual activity becomes simpler when administrative actions come from specific accounts.
Ease of Management: Separating regular and privileged users allows for different policies to be applied, such as stricter password requirements or multi-factor authentication (MFA) mandates specifically for privileged accounts.
Avoiding Unintended Changes: Requiring users to switch to a separate privileged account decreases the likelihood of accidentally making changes with broader implications.
Understanding the Risks of Privileged Accounts
Insider Threats: Since privileged accounts have great power, disgruntled employees or those with malicious intentions can cause considerable damage if they gain access. They can manipulate data, introduce malware, or wipe systems clean, leading to significant business disruptions.
Unauthorized Access: Cybercriminals often aim for privileged accounts because of the elevated access they provide. Compromised accounts can result in data breaches, financial losses, and damage to one's reputation.
Mistakes with Broad Impacts: Even well-intentioned actions can have unforeseen consequences. A misconfiguration or an error by someone with elevated permissions can have widespread effects, potentially impacting the entire organization.
Shadow IT Risks: If privileged account management isn't structured, individuals might create unauthorized software, applications, or even protocols that aren't in line with the company's IT policies. Such "shadow IT" elements can introduce vulnerabilities.
Creating A Privileged User Account in AD
Step 1: Creating an OU for Administrative Accounts To improve security and manageability, we will create a distinct Organizational Unit (OU) in Active Directory for our Admin accounts. This will allow us to apply specific security policies for increased security. Additionally, separating Admin accounts from general user policies streamlines administrative tasks, preventing unintended changes that might impact critical admin accounts and vice versa.
In the IT Department section of Active Directory, follow these steps to create a new Organizational Unit (OU) for Administrators:
Right-click on the IT Department folder.
From the menu, hover over "New" to expand the options.
Select "Organizational Unit" from the list.
In the prompt, enter the name "Administrators" for the OU.
Click "OK" to create
Step 2: Create a New User
In the new administrators OU, right-click and select "New" > "User."
Step 3: Filling Out the User's Details
First Name & Last Name: Enter the user's first and last names in the respective fields.
Full Name: This is typically a combination of the first and last names, but to differentiate privileged accounts from standard ones in our organization, we append "- SA Privileged" to the end. For example, "John Doe - SA Privileged" indicates that John Doe is a server admin with privileged access.
User Logon Name (SAMAccountName): While our organization typically uses the user's email address for standard account logon names, privileged accounts should be distinct. Add "adm." at the beginning and "-sa" at the end. So, if the usual logon name is "johndoe@company.com," a privileged server admin account might be "adm.johndoe-sa@company.com."
After filling out the details, click "Next" to proceed.

Step 4: Set up the user's password
Set a password for the first login and enable "User must change password at next logon." Click "Next."
Password: Set the initial password for a new user to log into their account. Avoid default passwords; don't use a generic default password for all new accounts.
User must change password at next logon: Choose "User must change password at next logon" to increase security for new accounts. This ensures the temporary password is changed on the first login and allows users to set a memorable password.

Step 5: Review and finish
Check your entered details and click "Finish" to create the user.

Step 6: Assigning Elevated Privileges After creating the user, you'll need to assign them the appropriate elevated privileges:
Double-click on the user's name to access their properties.
Navigate to the "Member Of" tab.
Click on the "Add" button.
In the pop-up window's "Enter the object names to select" field, type "Domain Admins."
Click "Check Names" to verify the security group exists and is correctly identified.
Once "Domain Admins" is highlighted or underlined, click "OK" to add the user to this group.
Finally, click "Apply" to save your changes.
Security Tip: Grant only the minimum required permissions. Always follow the Principle of Least Privilege (PoLP) – an account should only have the permissions necessary to fulfill its duties, no more.
Step 7: Review and Finish
Double-check all details you've entered, particularly the groups to which the account belongs, ensuring no unnecessary permissions are granted. Once you're certain everything is correct, click "Finish."
Why You Should Avoid Using the Default Administrator Account for AD Management
Thus far, we have been using the Windows Server Administrator account to build out our AD environment. Using a general account in this way is not recommended for several reasons:
Security Risks: The default administrator account is a common target for attackers. By frequently using this account, there's a higher chance of exposure to potential threats.
Lack of Accountability: Without individual admin accounts, it's hard to trace who made what changes, making audits and troubleshooting more difficult.
Elevated Privilege Abuse: The default administrator account has the highest privileges and goes against the security practice of least privileges.
Limited Customization: Specific policies or configurations might be needed for individual administrators. Using a general account restricts the ability to fine-tune settings for individual users.
Best Practices Violation: Industry best practices advise against using default admin accounts for day-to-day tasks, emphasizing the creation of separate accounts with the principle of least privilege.
For the above reasons and more, organizations should aim to minimize using the default Administrator account and instead use individual accounts with the necessary permissions for specific tasks. For the remainder of the series, we will access the server admin privileged account we created to make changes to our AD environment, adhering to best practices.
Accessing Your Privileged Account
Let's go through the steps to log out of the default Administrator account and access the System Administrator account we created.
Step 1: Logging Out of the Default Administrator Account
Navigate to the Windows Icon at your screen's bottom right-hand corner.
A menu will pop up on the left side. The topmost account listed is the one you're currently signed into - likely the default administrator account.
Click on the "administrator" option, and a dropdown will appear.
From this dropdown, choose "Sign out."
Step 2: Sign Into Your System Administrator Account
Once you've been redirected to the lock screen, press Ctrl-Alt-Del together. This bypasses the date and time display, presenting you with the login page.
You'll initially see the Administrator account since that's the account you just signed out from. However, we need to access a different account. To do this, go to the bottom left-hand corner and click "Other user."
Now, a login field will appear. In the "User name" section, type in your User Logon Name (often referred to as SAMAccountName).
Subsequently, in the "Password" section, type in the password you assigned when creating this account.
If you've set up the account with a one-time password requirement, you may be prompted to create a new one after typing in your password. If this appears, follow the on-screen instructions to reset your password.
In IT management, small actions, like the accounts we use to administer our environments, can have profound security and operational implications. The default Administrator account, while convenient, brings along a myriad of vulnerabilities and inefficiencies. By transitioning to a tailored System Administrator account, we reinforce our commitment to cybersecurity and the smooth operation of our Active Directory environment. As we progress in this series, remember to log into your System Admin account to embrace best practices early on and watch your system thrive in security and functionality.
Navigating Active Directory can initially seem daunting, but understanding the nuances between different account types and their management is the first step toward a secure and efficient IT environment. Organizations can optimize their AD management and ensure top-tier security by distinguishing between standard and privileged accounts and knowing when and how to use each. Transitioning away from the default Administrator account and harnessing the capabilities of custom System Administrator accounts is not just a best practice; it's an evolution toward a more secure, accountable, and organized AD environment. In the forthcoming posts, we’ll explore more advanced AD functionalities and best practices.